Stop Serving Dry Chicken and Mushy Rice
Most chicken and rice recipes fail because of a fundamental physics problem: chicken and grains have completely different cooking requirements. By the time the rice is tender enough to eat, the chicken breast has been reduced to a dry, stringy mess. Conversely, if you cook the chicken until it’s just juicy, you’re often left with a pool of starchy, crunchy rice at the bottom of the pot.
This isn’t just about a lack of flavor; it’s a failure of moisture management. Many home cooks try to fix blandness by dumping in a « symphony » (wait, let’s keep it simple) by dumping in generic poultry seasoning, which only masks the texture issues. Over the years, I’ve seen thousands of people struggle with 11 Foolproof Chicken Recipes and Rice for Perfectly Seasoned Meals, and the mistake is almost always the same: failing to account for the evaporation rate of the cooking liquid.
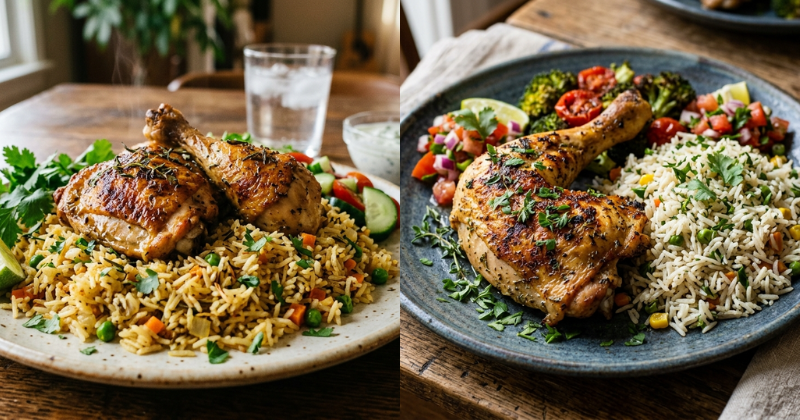
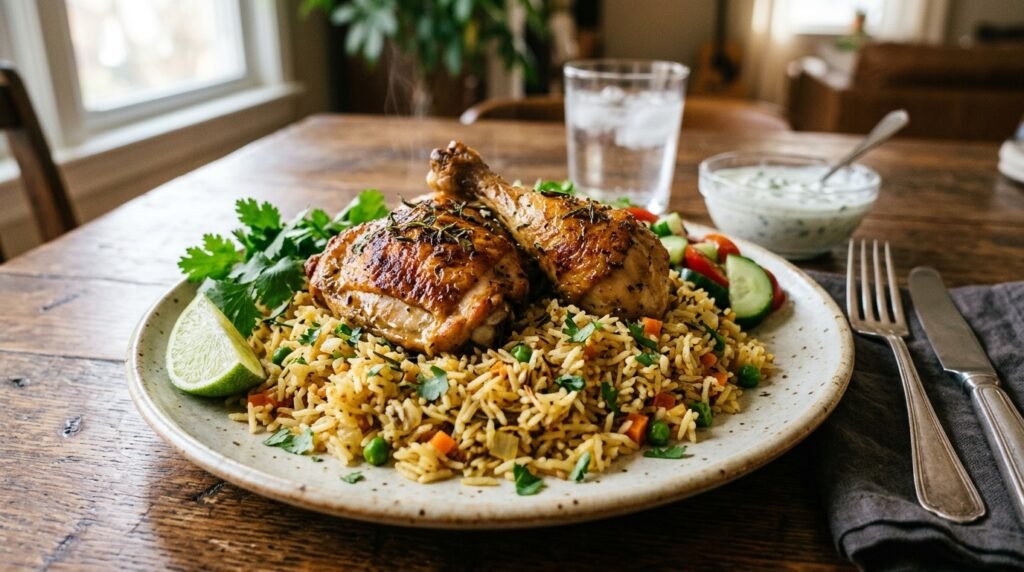
This guide fixes that. We are moving away from the « dump and pray » method. You’re going to learn how to produce chicken that stays succulent and rice that remains distinct, fluffy, and deeply infused with fat and aromatics. No more soggy bottoms, no more parched protein.
The « Hero » Technique: The High-Heat Aromatic Bloom
To beat the top results on Google, you need more than just a good timer. You need the High-Heat Aromatic Bloom. Most recipes tell you to sauté onions and then add your liquid. We don’t do that.
The secret to « Perfectly Seasoned » meals is toasting the dry rice in rendered chicken fat alongside the spices before a drop of liquid touches the pan. This is a two-fold win:
- Gelatinization Control: Coating each grain of rice in fat (preferably schmaltz or high-quality butter like Kerrygold) creates a barrier. This prevents the starch from rushing out into the water, which is exactly how you avoid that gluey, « cafeteria-style » texture.
- Flavor Extraction: Many flavor compounds in spices like cumin, turmeric, and black pepper are fat-soluble, not water-soluble. By toasting them in the fat for 60 seconds, you « bloom » the oils, resulting in a depth of flavor that boiling alone can never achieve.
Ingredient Deep Dive: Why These Matter
Don’t grab whatever is in the pantry. If you want professional results, use these specific staples:
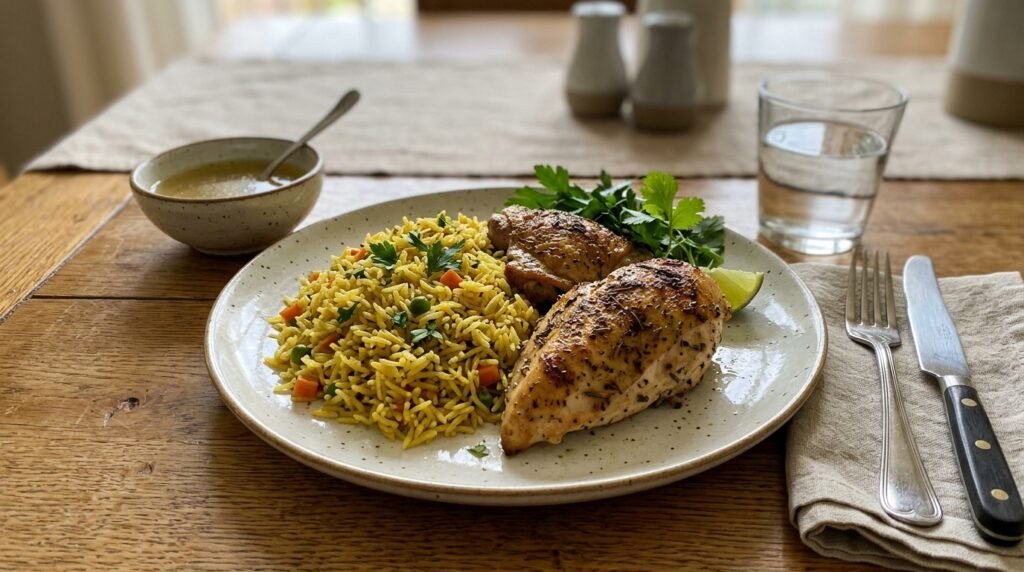
- The Rice: Use long-grain Basmati or Jasmine. Avoid « Enriched White Rice » or parboiled varieties like Uncle Ben’s for this specific method. Basmati has a lower glycemic index and stays separate when cooked.
- The Salt: Use Diamond Crystal Kosher Salt. If you use Morton’s or table salt, cut the measurement by half. Diamond Crystal has larger, hollow flakes that adhere better to the chicken and make it much harder to over-salt your base.
- The Liquid: Use Low-Sodium Chicken Bone Broth. Regular broth is often just salt-water. Bone broth contains gelatin, which gives the rice a « lip-smacking » richness and better mouthfeel.
- The Fat: Ghee or Avocado Oil. You need a high smoke point for the initial sear. Extra Virgin Olive Oil will smoke and turn bitter before the chicken skin gets crispy.
The Walkthrough
Phase 1: The Prep and Sear
First, pat your chicken thighs bone-dry with paper towels. Moisture is the enemy of the sear. Season aggressively with salt and pepper.
- Heat 2 tablespoons of avocado oil in a heavy-bottomed Dutch oven (like a Le Creuset) over medium-high heat.
- Place chicken skin-side down. Do not move it.
- Visual Cue: Look for the edges of the skin to turn a deep golden brown. The chicken should « release » naturally from the pan. If it sticks, it’s not ready.
Pro-Tip: If using chicken breasts, sear them quickly and remove them. Unlike thighs, breasts should only be added back to the pot for the last 5-7 minutes of steaming to prevent drying out.
Phase 2: The Aromatic Bloom and Toast
Remove the chicken (it won’t be cooked through yet). You should have about 2-3 tablespoons of fat in the pan. If there’s more, pour it out; if less, add a knob of butter.
- Add diced yellow onion and sauté until translucent.
- Add your dry rice directly to the onions and fat. Stir constantly for 2 minutes.
- Visual Cue: The ends of the rice grains should look translucent, and the centers should look bright white. You will notice a nutty, popcorn-like aroma.
- Add your spices (garlic, thyme, turmeric) now. Stir for 30 seconds until the oil turns the color of the spices.
Pro-Tip: Use a wooden flat-edged spatula to scrape the « fond » (the brown bits) off the bottom of the pan during this step. That is concentrated flavor.
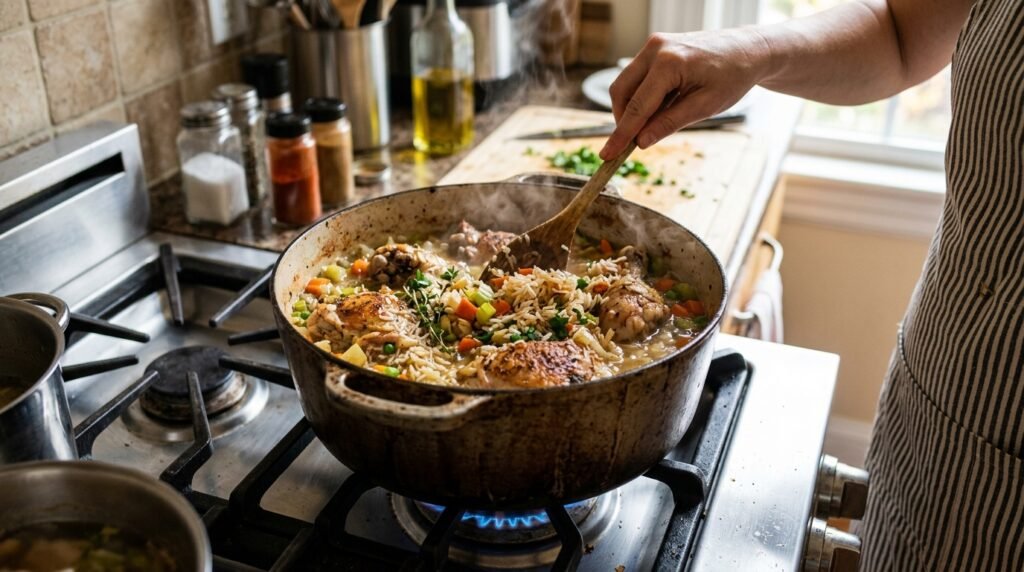
Phase 3: The Gentle Simmer
- Pour in your room-temperature broth. Scrape the bottom one last time.
- Nestle the chicken back into the rice, skin-side UP. The skin should remain above the liquid line to stay crispy.
- Bring to a boil, then immediately drop the heat to the lowest setting.
- Cover with a tight-fitting lid. If your lid is loose, place a piece of foil over the pot before putting the lid on.
Pro-Tip: Once the lid is on, do not open it. Every time you peek, you lose the steam pressure required to cook the rice evenly. Set a timer for 18 minutes.
Troubleshooting Table
| What Went Wrong | How to Fix It Next Time |
| Rice is crunchy in the middle. | You lost steam. Use a tighter lid or add 2 extra tablespoons of liquid next time. Let it sit, covered, for 10 minutes after turning off the heat. |
| Chicken skin is rubbery. | The skin was submerged in liquid. Ensure the chicken sits on top of the rice bed, not buried in the broth. |
| The bottom is burnt. | Your heat was too high. Use a « simmer ring » or a lower burner setting. The liquid should barely whisper, not roar. |
| Rice is a sticky mass. | You didn’t toast the rice long enough or you used too much liquid. Stick to a 1:1.5 ratio (1 cup rice to 1.5 cups broth). |
Storage & Reheating

Storage: Move leftovers to an airtight glass container within 2 hours of cooking. Rice is prone to Bacillus cereus bacteria if left at room temperature too long. It will stay safe and tasty for up to 3 days.
Reheating: Do not use the microwave if you want to keep the texture.
- The Oven Method: Place in a small baking dish, add 1 tablespoon of water over the rice, cover tightly with foil, and heat at 325°F for 15 minutes.
- The Skillet Method: If you want « crispy rice » leftovers, heat a non-stick skillet with a little oil and fry the rice and chicken together until the bottom of the rice gets crunchy.
Recipe Card Summary
- Prep Time: 15 Minutes
- Cook Time: 25 Minutes
- Total Time: 40 Minutes
- Yield: 4 Servings
- Equipment Needed: Large Dutch Oven or heavy-bottomed skillet with a lid, Instant-read meat thermometer, Wooden spatula.
- Internal Temp Goal: Chicken thighs should reach 175°F (they handle higher heat better than breasts), while breasts must be pulled at 160°F to carry-over cook to 165°F.
By following this method, you aren’t just making another chicken and rice dish. You are mastering the variables of heat, fat, and hydration. This is the blueprint for a perfectly seasoned, technically sound meal that works every single time.